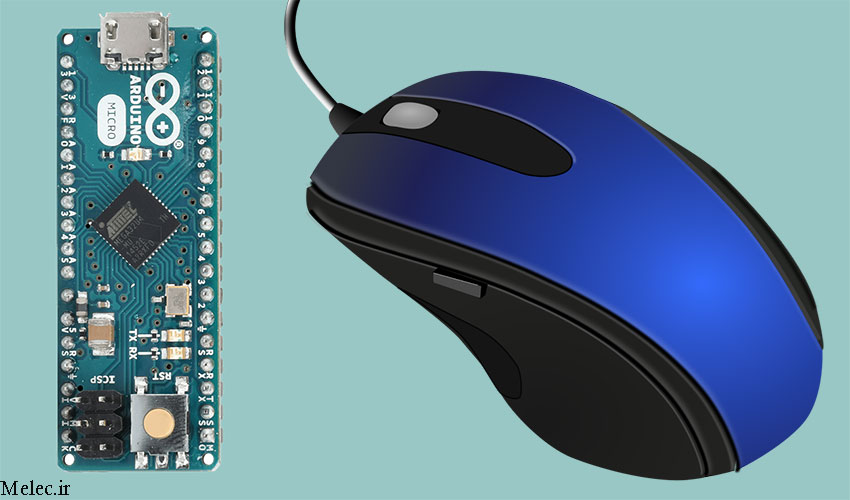
با استفاده از کتابخانه Mouse میتوانید ماوس کامپیوتر خود را توسط بردهای آردوینو Leonardo ، Micro یا Due کنترل نمایید.
در این مثال از 5 کلید برای کنترل ماوس استفاده می کنیم. 4 کلید مربوط به کنترل جهت است (بالا، پایین، چپ و راست) و یک کلید هم برای کلیک چپ ماوس هست. کنترل موقعیت ماوس توسط آردوینو به صورت نسبی انجام می شود به این معنا که با هربار زدن کلید و خوانده شدن آن، موقعیت ماوس نسبت به موقعیت قبلی خود تغییر خواهد کرد.
قطعات و وسایل مورد نیاز :
- 1 عدد برد بورد
- 1 عدد برد آردوینو Leonardo ، Micro یا Due
- 5 عدد مقاومت 10 کیلو اهم
- 5 عدد کلید فشاری
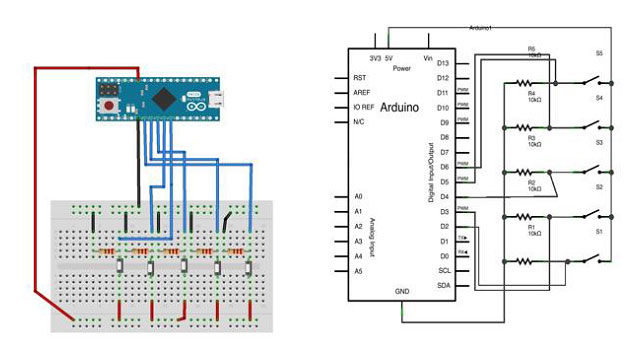
مطابق شکل زیر قطعات را بر روی برد برد خود قرار دهید و اتصالات را مطابق شکل برقرار کنید.
نرم افزار کنترل کلیدهای ماوس با آردوینو
برنامه آردوینو را بر روی کامپیوتر خود باز نمایید. کدهای نوشته شده در این بخش مدار شما را کنترل می کند. یک sketch جدید با کلیک بر روی گزینه New ایجاد نمایید.
کد آردوینو :
/*
 Button Mouse Control
 For Leonardo and Due boards only .Controls the mouse from
 five pushbuttons on an Arduino Leonardo, Micro or Due.
 Hardware:
 * 5 pushbuttons attached to D2, D3, D4, D5, D6
 The mouse movement is always relative. This sketch reads
 four pushbuttons, and uses them to set the movement of the mouse.
 WARNING: When you use the Mouse.move() command, the Arduino takes
 over your mouse! Make sure you have control before you use the mouse commands.
 Visit Melec.ir for more tutorials and projects
*/

#include "Mouse.h"
// set pin numbers for the five buttons:
const int upButton = 2;
const int downButton = 3;
const int leftButton = 4;
const int rightButton = 5;
const int mouseButton = 6;
int range = 5; // output range of X or Y movement; affects movement speed
int responseDelay = 10; // response delay of the mouse, in ms

void setup() {
 // initialize the buttons' inputs:
 pinMode(upButton, INPUT);
 pinMode(downButton, INPUT);
 pinMode(leftButton, INPUT);
 pinMode(rightButton, INPUT);
 pinMode(mouseButton, INPUT);
 // initialize mouse control:
 Mouse.begin();
}

void loop() {
 // read the buttons:
 int upState = digitalRead(upButton);
 int downState = digitalRead(downButton);
 int rightState = digitalRead(rightButton);
 int leftState = digitalRead(leftButton);
 int clickState = digitalRead(mouseButton);
 // calculate the movement distance based on the button states:
 int xDistance = (leftState - rightState) * range;
 int yDistance = (upState - downState) * range;
 // if X or Y is non-zero, move:
 if ((xDistance != 0) || (yDistance != 0)) {
 Mouse.move(xDistance, yDistance, 0);
 }

// if the mouse button is pressed:
 if (clickState == HIGH) {
 // if the mouse is not pressed, press it:
 if (!Mouse.isPressed(MOUSE_LEFT)) {
 Mouse.press(MOUSE_LEFT);
 }
 } else { // else the mouse button is not pressed:
 // if the mouse is pressed, release it:
 if (Mouse.isPressed(MOUSE_LEFT)) {
 Mouse.release(MOUSE_LEFT);
 }
 }
 // a delay so the mouse does not move too fast:
 delay(responseDelay);
}
نکات برنامه :
برد را توسط یک کابل میکرو USB به کامپیوتر وصل نمایید. کلیدها را به ورودی های دیجیتال 2 تا 6 متصل نمایید. مقاومت های 10 کیلو اهم پایین کش را به این پایه ها متصل نمایید.
اگر این نوشته برایتان مفید بود لطفا کامنت بنویسید.
 آموزش طراحی و ساخت پروژه های الکترونیک و برنامه نویسی میکروکنترلر ها آموزش الکترونیک,آموزش رزبری پای,آموزش راه اندازی ماژول و سنسور,آموزش آردوینو,نرم افزار های الکترونیک, طراحیPCB,برنامه نویسی میکروکنترلرها ARM AVR PIC FPGA