در این دورهی آموزشی آردوینو به شما نحوهی ساخت یک رادار جالب با استفاده از برد آردوینو و محیط پردازشی توسعه یافته را آموزش خواهیم داد. شما میتوانید ویدئو زیر را مشاهده کرده و یا برای جزئیات بیشتر دورهی آموزشی مکتوب را مطالعه کنید.
نگاه کلی
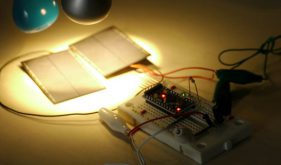
تمام چیزی که برای این پروژهی آردوینو نیاز دارید، یک سنسور آلتراسونیک (Ultrasonic) برای تشخیص اشیا، یک سروو موتور (Servomotor) کوچک ساده برای چرخاندن سنسور و یک برد آردوینو برای کنترل آنها است. شما میتوانید ویدئو بالا را مشاهده کرده و یا برای جزئیات بیشتر دورهی آموزشی نوشته شده را مطالعه کنید.
وسایل مورد نیاز برای ساخت رادار با آردوینو
- سنسور آلتراسونیک HC-SRF04
- سروو موتور
- برد آردوینو
- بِرِد بورد
- سیم اتصال
پیشنیازهای مفید
ساخت دستگاه
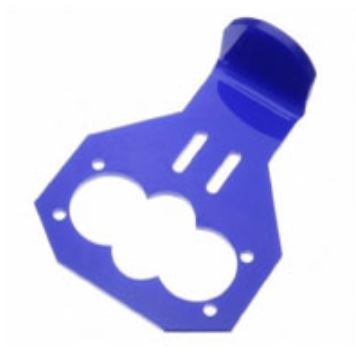
در ابتدا یک پایهی مقوایی برای متصل کردن سنسور آلتراسونیک به سروو موتور میسازیم. آن را به صورتی که در شکل زیر نشان داده شده است خم کرده، به آن چسب میزنیم و همانطور که در تصویر زیر مشخص است، آن را توسط یک پیچگوشتی روی سروو موتور محکم میکنیم.
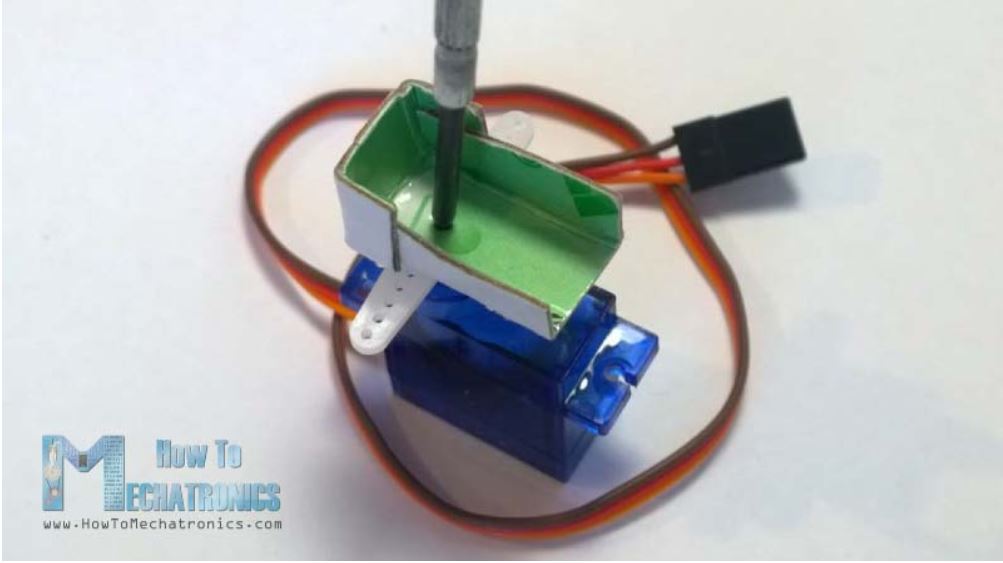
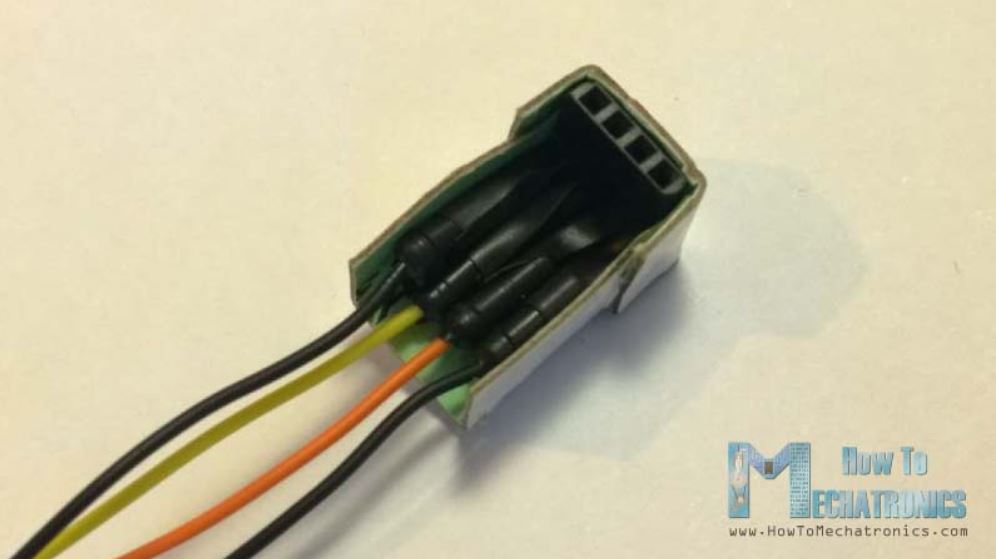
همچنین یک پین که روی آن 4 جای سیم برای اتصال سنسور وجود دارد را روی آن پیوست میکنیم.
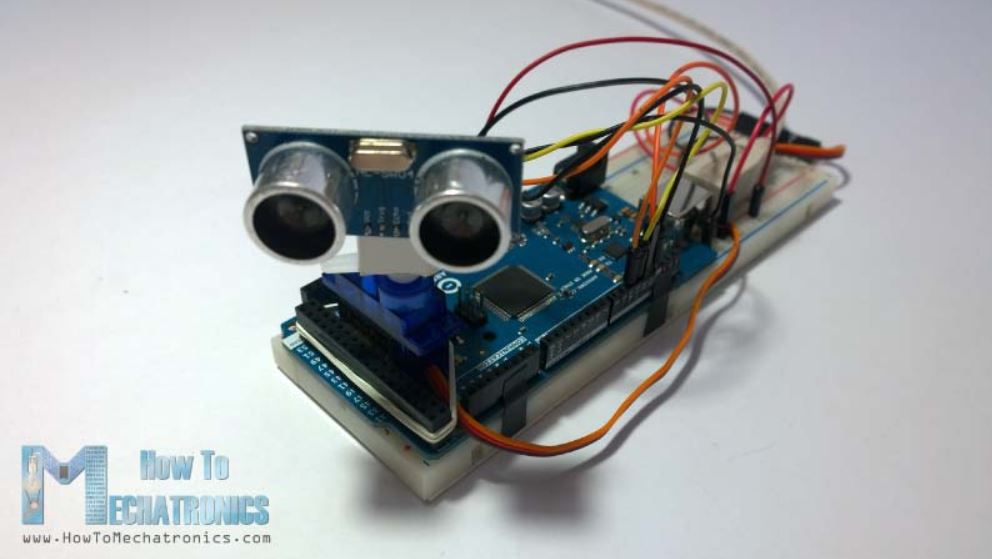
در نهایت با یک باند کشی سروو موتور را روی برد آردوینو محکم متصل کردیم .
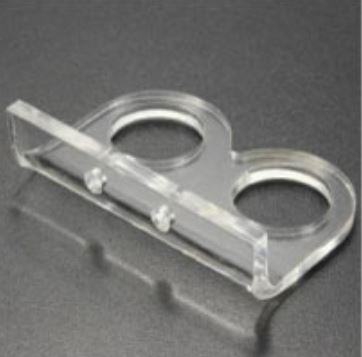
همچنین تعدادی گیرهی بالا نگهدارنده ماژول آلتراسونیک در سایت Banggood موجود است که میتوانید آنها را از لینکهای زیر تهیه کنید.
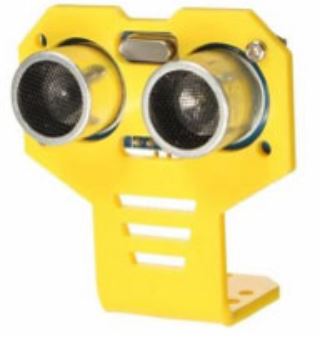
- ماژول آلتراسونیک با پایهی نگهدارنده
- پایهی نگهدارنده برای ماژول آلتراسونیک
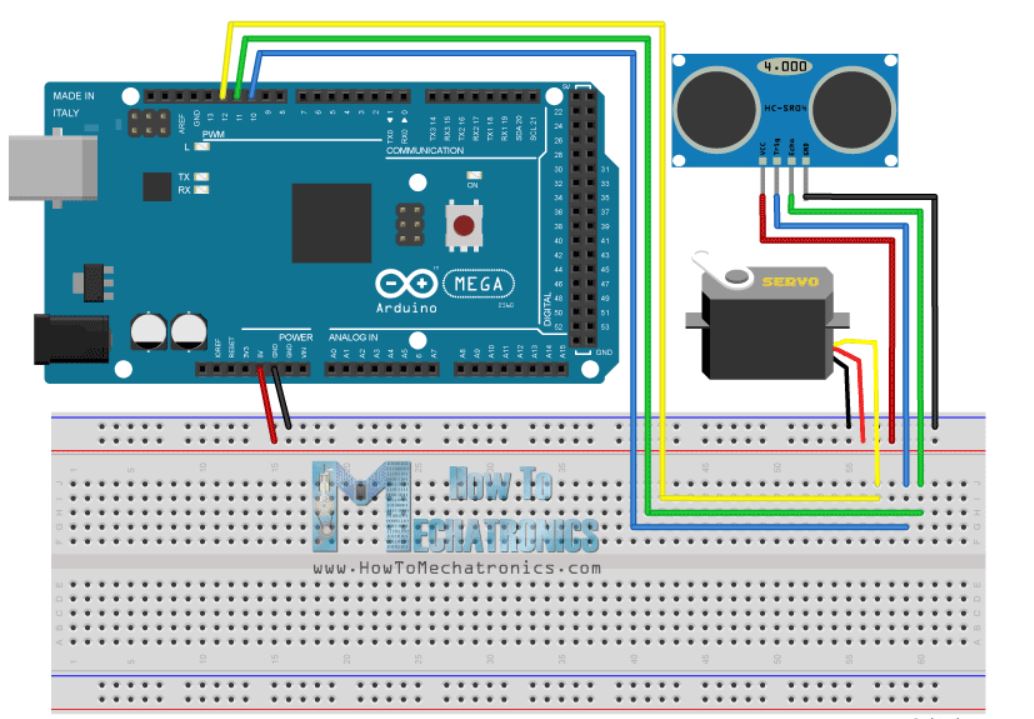
شماتیک مدار رادار با آردوینو
ماژول آلتراسونیک HC-SR04 را به پینهای 10 و11 و همچنین سروو موتور را به پین 12 از برد آردوینو متصل میکنیم.
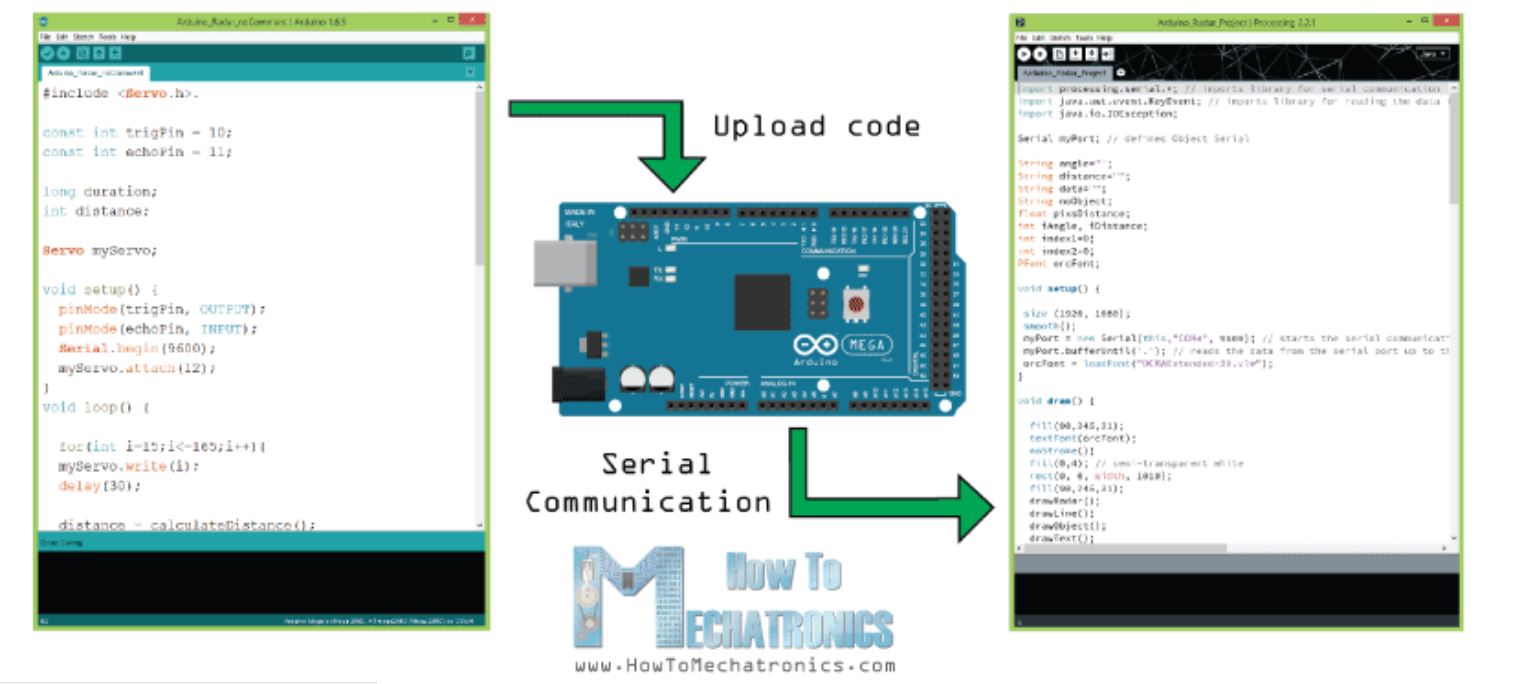
کد منبع
حالا باید کدی بنویسیم و آن را روی برد آردوینو آپلود کنیم تا ارتباط بین برد آردوینو و محیط برنامهنویسی در حال پردازش را فعالسازی کند. برای درک بهتر روند این ارتباط میتوانید با کلیک در این بخش دوره آموزشی آردوینو ما را مشاهده نمایید.
در این بخش منبع کد آردوینو با توضیحات کامل در مقابل هر خط به صورت زیر قابل مشاهده است.
// Includes the Servo library
#include <Servo.h>.

// Defines Tirg and Echo pins of the Ultrasonic Sensor
const int trigPin = 10;
const int echoPin = 11;
// Variables for the duration and the distance
long duration;
int distance;

Servo myServo; // Creates a servo object for controlling the servo motor

void setup() {
  pinMode(trigPin, OUTPUT); // Sets the trigPin as an Output
  pinMode(echoPin, INPUT); // Sets the echoPin as an Input
  Serial.begin(9600);
  myServo.attach(12); // Defines on which pin is the servo motor attached
}
void loop() {
  // rotates the servo motor from 15 to 165 degrees
  for(int i=15;i<=165;i++){
  myServo.write(i);
  delay(30);
  distance = calculateDistance();// Calls a function for calculating the distance measured by the Ultrasonic sensor for each degree

  Serial.print(i); // Sends the current degree into the Serial Port
  Serial.print(","); // Sends addition character right next to the previous value needed later in the Processing IDE for indexing
  Serial.print(distance); // Sends the distance value into the Serial Port
  Serial.print("."); // Sends addition character right next to the previous value needed later in the Processing IDE for indexing
  }
  // Repeats the previous lines from 165 to 15 degrees
  for(int i=165;i>15;i--){
  myServo.write(i);
  delay(30);
  distance = calculateDistance();
  Serial.print(i);
  Serial.print(",");
  Serial.print(distance);
  Serial.print(".");
  }
}
// Function for calculating the distance measured by the Ultrasonic sensor
int calculateDistance(){

  digitalWrite(trigPin, LOW);
  delayMicroseconds(2);
  // Sets the trigPin on HIGH state for 10 micro seconds
  digitalWrite(trigPin, HIGH);
  delayMicroseconds(10);
  digitalWrite(trigPin, LOW);
  duration = pulseIn(echoPin, HIGH); // Reads the echoPin, returns the sound wave travel time in microseconds
  distance= duration*0.034/2;
  return distance;
}
حالا ما مقادیر فاصله و زاویه اندازهگیری شده توسط سنسور را به وسیلهی تابع ()SerialEvent را از برد آردوینو به محیط برنامهنویسی قابل پردازش انتقال میدهیم. این تابع اطلاعات را از پورت سریال میخواند و دو مقدار زاویه و فاصله را به ترتیب در متغیرهای iAngle و iDistance ذخیره میکند. این مقادیر جهت رسم رادار، خطوط، اشیا شناسایی شده و بخشی از متنها استفاده میشوند.
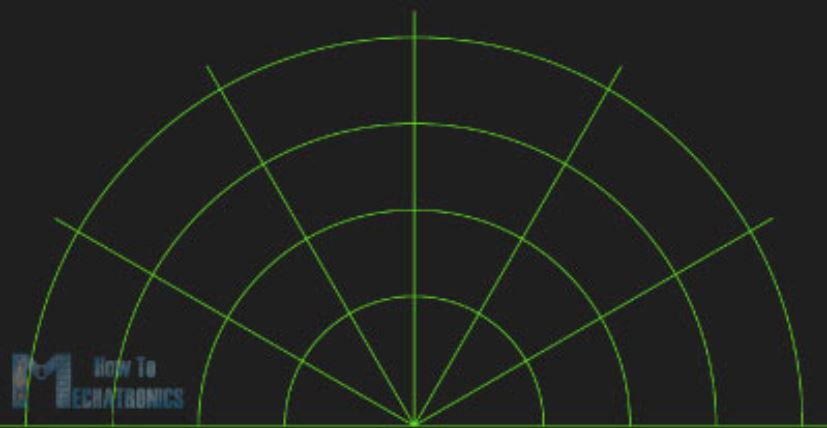
برای کشیدن رادار از تابع ()drawRadar استفاده کردهایم که از دو توابع ()arc و ()line تشکیل شده است.
void drawRadar() {
  pushMatrix();
  translate(960,1000); // moves the starting coordinats to new location
  noFill();
  strokeWeight(2);
  stroke(98,245,31);
  // draws the arc lines
  arc(0,0,1800,1800,PI,TWO_PI);
  arc(0,0,1400,1400,PI,TWO_PI);
  arc(0,0,1000,1000,PI,TWO_PI);
  arc(0,0,600,600,PI,TWO_PI);
  // draws the angle lines
  line(-960,0,960,0);
  line(0,0,-960*cos(radians(30)),-960*sin(radians(30)));
  line(0,0,-960*cos(radians(60)),-960*sin(radians(60)));
  line(0,0,-960*cos(radians(90)),-960*sin(radians(90)));
  line(0,0,-960*cos(radians(120)),-960*sin(radians(120)));
  line(0,0,-960*cos(radians(150)),-960*sin(radians(150)));
  line(-960*cos(radians(30)),0,960,0);
  popMatrix();
}
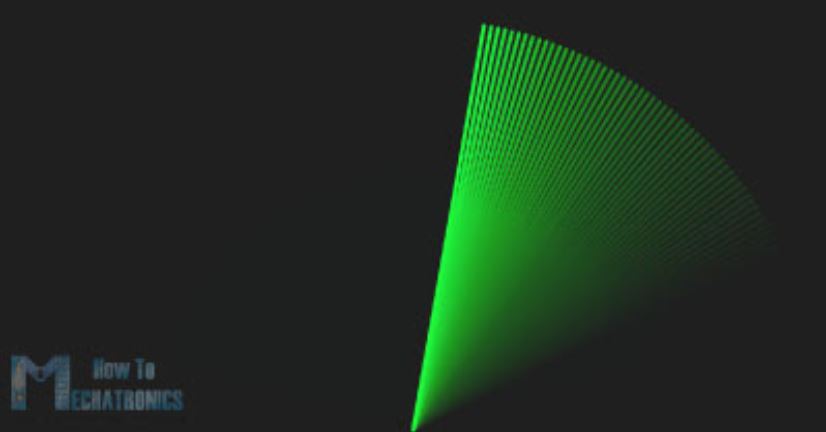
برای رسم خطی که در طول رادار دائما حرکت میکند تابع ()drawLine را ایجاد کردهایم. مرکز چرخش این خط به کمک توابع ()translate و ()line تنظیم میشود که درآن متغیر iAngle از خط قرمز رسم شده به ازای هر درجه استفاده میکند.
void drawLine() {
  pushMatrix();
  strokeWeight(9);
  stroke(30,250,60);
  translate(960,1000); // moves the starting coordinats to new location
  line(0,0,950*cos(radians(iAngle)),-950*sin(radians(iAngle))); // draws the line according to the angle
  popMatrix();
}
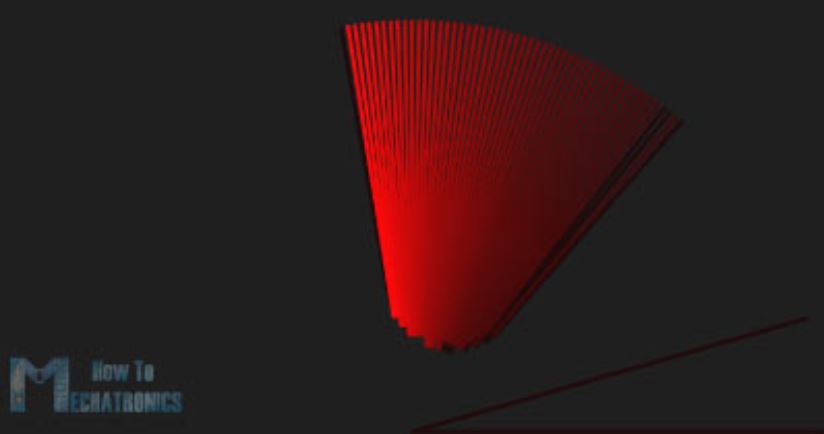
جهت رسم اشیا شناسایی شده، تابع ()drawObject را تعریف نمودیم. این تابع مقدار فاصله را از سنسور آلتراسونیک دریافت کرده، آن را به پیکسل تبدیل میکند و با ترکیب آن با مقدار زاویه سنسور، شی را روی رادار رسم میکند.
void drawObject() {
  pushMatrix();
  translate(960,1000); // moves the starting coordinats to new location
  strokeWeight(9);
  stroke(255,10,10); // red color
  pixsDistance = iDistance*22.5; // covers the distance from the sensor from cm to pixels
  // limiting the range to 40 cms
  if(iDistance<40){
    // draws the object according to the angle and the distance
  line(pixsDistance*cos(radians(iAngle)),-pixsDistance*sin(radians(iAngle)),950*cos(radians(iAngle)),-950*sin(radians(iAngle)));
  }
  popMatrix();
}
جهت نوشتن متن بر روی صفحه تابع ()drawText به صورتی تعریف شده است که در مکانهای خاصی، متن را روی صفحه نمایش میدهد. همه این توابع در تابع ()draw اصلی فراخوانی میشوند که دائما تکرار شده و تصویر روی صفحه رادار را بهروزرسانی میکند. همچنین در اینجااز تابع ()fill نیز استفاده شده است که با دو متغیر برای تنظیم تاری حرکت و محو شدن آهسته خط در حال حرکت تعریف میشود.
void draw() {

  fill(98,245,31);
  textFont(orcFont);
  // simulating motion blur and slow fade of the moving line
  noStroke();
  fill(0,4);
  rect(0, 0, width, 1010);

  fill(98,245,31); // green color
  // calls the functions for drawing the radar
  drawRadar();
  drawLine();
  drawObject();
  drawText();
}
در اینجا شکل نهایی صفحه رادار را مشاهده میکنید.

کد کامل مربوط به این رادار ساخته شده با آردوینو در اینجا آورده شده است.
import processing.serial.*; // imports library for serial communication
import java.awt.event.KeyEvent; // imports library for reading the data from the serial port
import java.io.IOException;

Serial myPort; // defines Object Serial
// defubes variables
String angle="";
String distance="";
String data="";
String noObject;
float pixsDistance;
int iAngle, iDistance;
int index1=0;
int index2=0;
PFont orcFont;

void setup() {

 size (1920, 1080);
 smooth();
 myPort = new Serial(this,"COM4", 9600); // starts the serial communication
 myPort.bufferUntil('.'); // reads the data from the serial port up to the character '.'. So actually it reads this: angle,distance.
 orcFont = loadFont("OCRAExtended-30.vlw");
}

void draw() {

  fill(98,245,31);
  textFont(orcFont);
  // simulating motion blur and slow fade of the moving line
  noStroke();
  fill(0,4);
  rect(0, 0, width, 1010);

  fill(98,245,31); // green color
  // calls the functions for drawing the radar
  drawRadar();
  drawLine();
  drawObject();
  drawText();
}

void serialEvent (Serial myPort) { // starts reading data from the Serial Port
  // reads the data from the Serial Port up to the character '.' and puts it into the String variable "data".
  data = myPort.readStringUntil('.');
  data = data.substring(0,data.length()-1);

  index1 = data.indexOf(","); // find the character ',' and puts it into the variable "index1"
  angle= data.substring(0, index1); // read the data from position "0" to position of the variable index1 or thats the value of the angle the Arduino Board sent into the Serial Port
  distance= data.substring(index1+1, data.length()); // read the data from position "index1" to the end of the data pr thats the value of the distance

  // converts the String variables into Integer
  iAngle = int(angle);
  iDistance = int(distance);
}

void drawRadar() {
  pushMatrix();
  translate(960,1000); // moves the starting coordinats to new location
  noFill();
  strokeWeight(2);
  stroke(98,245,31);
  // draws the arc lines
  arc(0,0,1800,1800,PI,TWO_PI);
  arc(0,0,1400,1400,PI,TWO_PI);
  arc(0,0,1000,1000,PI,TWO_PI);
  arc(0,0,600,600,PI,TWO_PI);
  // draws the angle lines
  line(-960,0,960,0);
  line(0,0,-960*cos(radians(30)),-960*sin(radians(30)));
  line(0,0,-960*cos(radians(60)),-960*sin(radians(60)));
  line(0,0,-960*cos(radians(90)),-960*sin(radians(90)));
  line(0,0,-960*cos(radians(120)),-960*sin(radians(120)));
  line(0,0,-960*cos(radians(150)),-960*sin(radians(150)));
  line(-960*cos(radians(30)),0,960,0);
  popMatrix();
}

void drawObject() {
  pushMatrix();
  translate(960,1000); // moves the starting coordinats to new location
  strokeWeight(9);
  stroke(255,10,10); // red color
  pixsDistance = iDistance*22.5; // covers the distance from the sensor from cm to pixels
  // limiting the range to 40 cms
  if(iDistance<40){
    // draws the object according to the angle and the distance
  line(pixsDistance*cos(radians(iAngle)),-pixsDistance*sin(radians(iAngle)),950*cos(radians(iAngle)),-950*sin(radians(iAngle)));
  }
  popMatrix();
}

void drawLine() {
  pushMatrix();
  strokeWeight(9);
  stroke(30,250,60);
  translate(960,1000); // moves the starting coordinats to new location
  line(0,0,950*cos(radians(iAngle)),-950*sin(radians(iAngle))); // draws the line according to the angle
  popMatrix();
}

void drawText() { // draws the texts on the screen

  pushMatrix();
  if(iDistance>40) {
  noObject = "Out of Range";
  }
  else {
  noObject = "In Range";
  }
  fill(0,0,0);
  noStroke();
  rect(0, 1010, width, 1080);
  fill(98,245,31);
  textSize(25);
  text("10cm",1180,990);
  text("20cm",1380,990);
  text("30cm",1580,990);
  text("40cm",1780,990);
  textSize(40);
  text("Object: " + noObject, 240, 1050);
  text("Angle: " + iAngle +" °", 1050, 1050);
  text("Distance: ", 1380, 1050);
  if(iDistance<40) {
  text("        " + iDistance +" cm", 1400, 1050);
  }
  textSize(25);
  fill(98,245,60);
  translate(961+960*cos(radians(30)),982-960*sin(radians(30)));
  rotate(-radians(-60));
  text("30°",0,0);
  resetMatrix();
  translate(954+960*cos(radians(60)),984-960*sin(radians(60)));
  rotate(-radians(-30));
  text("60°",0,0);
  resetMatrix();
  translate(945+960*cos(radians(90)),990-960*sin(radians(90)));
  rotate(radians(0));
  text("90°",0,0);
  resetMatrix();
  translate(935+960*cos(radians(120)),1003-960*sin(radians(120)));
  rotate(radians(-30));
  text("120°",0,0);
  resetMatrix();
  translate(940+960*cos(radians(150)),1018-960*sin(radians(150)));
  rotate(radians(-60));
  text("150°",0,0);
  popMatrix();
}
نسخه بهروزرسانی شده کد برای صفحه نمایش های با وضوح متفاوت، (تنها لازم است که مقدار داخل تابع ()size را با مقدار وضوح نمایشگر خود تغییر دهید).
/*   Arduino Radar Project
 *
 *   Updated version. Fits any screen resolution!
 *   Just change the values in the size() function,
 *   with your screen resolution.
 *
 *  by Dejan Nedelkovski,
 *  www.HowToMechatronics.com
 *
 */

import processing.serial.*; // imports library for serial communication
import java.awt.event.KeyEvent; // imports library for reading the data from the serial port
import java.io.IOException;

Serial myPort; // defines Object Serial
// defubes variables
String angle="";
String distance="";
String data="";
String noObject;
float pixsDistance;
int iAngle, iDistance;
int index1=0;
int index2=0;
PFont orcFont;

void setup() {

 size (1920, 1080); // ***CHANGE THIS TO YOUR SCREEN RESOLUTION***
 smooth();
 myPort = new Serial(this,"COM4", 9600); // starts the serial communication
 myPort.bufferUntil('.'); // reads the data from the serial port up to the character '.'. So actually it reads this: angle,distance.
 orcFont = loadFont("OCRAExtended-30.vlw");
}

void draw() {

  fill(98,245,31);
  textFont(orcFont);
  // simulating motion blur and slow fade of the moving line
  noStroke();
  fill(0,4);
  rect(0, 0, width, height-height*0.065);

  fill(98,245,31); // green color
  // calls the functions for drawing the radar
  drawRadar();
  drawLine();
  drawObject();
  drawText();
}

void serialEvent (Serial myPort) { // starts reading data from the Serial Port
  // reads the data from the Serial Port up to the character '.' and puts it into the String variable "data".
  data = myPort.readStringUntil('.');
  data = data.substring(0,data.length()-1);

  index1 = data.indexOf(","); // find the character ',' and puts it into the variable "index1"
  angle= data.substring(0, index1); // read the data from position "0" to position of the variable index1 or thats the value of the angle the Arduino Board sent into the Serial Port
  distance= data.substring(index1+1, data.length()); // read the data from position "index1" to the end of the data pr thats the value of the distance

  // converts the String variables into Integer
  iAngle = int(angle);
  iDistance = int(distance);
}

void drawRadar() {
  pushMatrix();
  translate(width/2,height-height*0.074); // moves the starting coordinats to new location
  noFill();
  strokeWeight(2);
  stroke(98,245,31);
  // draws the arc lines
  arc(0,0,(width-width*0.0625),(width-width*0.0625),PI,TWO_PI);
  arc(0,0,(width-width*0.27),(width-width*0.27),PI,TWO_PI);
  arc(0,0,(width-width*0.479),(width-width*0.479),PI,TWO_PI);
  arc(0,0,(width-width*0.687),(width-width*0.687),PI,TWO_PI);
  // draws the angle lines
  line(-width/2,0,width/2,0);
  line(0,0,(-width/2)*cos(radians(30)),(-width/2)*sin(radians(30)));
  line(0,0,(-width/2)*cos(radians(60)),(-width/2)*sin(radians(60)));
  line(0,0,(-width/2)*cos(radians(90)),(-width/2)*sin(radians(90)));
  line(0,0,(-width/2)*cos(radians(120)),(-width/2)*sin(radians(120)));
  line(0,0,(-width/2)*cos(radians(150)),(-width/2)*sin(radians(150)));
  line((-width/2)*cos(radians(30)),0,width/2,0);
  popMatrix();
}

void drawObject() {
  pushMatrix();
  translate(width/2,height-height*0.074); // moves the starting coordinats to new location
  strokeWeight(9);
  stroke(255,10,10); // red color
  pixsDistance = iDistance*((height-height*0.1666)*0.025); // covers the distance from the sensor from cm to pixels
  // limiting the range to 40 cms
  if(iDistance<40){
    // draws the object according to the angle and the distance
  line(pixsDistance*cos(radians(iAngle)),-pixsDistance*sin(radians(iAngle)),(width-width*0.505)*cos(radians(iAngle)),-(width-width*0.505)*sin(radians(iAngle)));
  }
  popMatrix();
}

void drawLine() {
  pushMatrix();
  strokeWeight(9);
  stroke(30,250,60);
  translate(width/2,height-height*0.074); // moves the starting coordinats to new location
  line(0,0,(height-height*0.12)*cos(radians(iAngle)),-(height-height*0.12)*sin(radians(iAngle))); // draws the line according to the angle
  popMatrix();
}

void drawText() { // draws the texts on the screen

  pushMatrix();
  if(iDistance>40) {
  noObject = "Out of Range";
  }
  else {
  noObject = "In Range";
  }
  fill(0,0,0);
  noStroke();
  rect(0, height-height*0.0648, width, height);
  fill(98,245,31);
  textSize(25);

  text("10cm",width-width*0.3854,height-height*0.0833);
  text("20cm",width-width*0.281,height-height*0.0833);
  text("30cm",width-width*0.177,height-height*0.0833);
  text("40cm",width-width*0.0729,height-height*0.0833);
  textSize(40);
  text("Object: " + noObject, width-width*0.875, height-height*0.0277);
  text("Angle: " + iAngle +" °", width-width*0.48, height-height*0.0277);
  text("Distance: ", width-width*0.26, height-height*0.0277);
  if(iDistance<40) {
  text("        " + iDistance +" cm", width-width*0.225, height-height*0.0277);
  }
  textSize(25);
  fill(98,245,60);
  translate((width-width*0.4994)+width/2*cos(radians(30)),(height-height*0.0907)-width/2*sin(radians(30)));
  rotate(-radians(-60));
  text("30°",0,0);
  resetMatrix();
  translate((width-width*0.503)+width/2*cos(radians(60)),(height-height*0.0888)-width/2*sin(radians(60)));
  rotate(-radians(-30));
  text("60°",0,0);
  resetMatrix();
  translate((width-width*0.507)+width/2*cos(radians(90)),(height-height*0.0833)-width/2*sin(radians(90)));
  rotate(radians(0));
  text("90°",0,0);
  resetMatrix();
  translate(width-width*0.513+width/2*cos(radians(120)),(height-height*0.07129)-width/2*sin(radians(120)));
  rotate(radians(-30));
  text("120°",0,0);
  resetMatrix();
  translate((width-width*0.5104)+width/2*cos(radians(150)),(height-height*0.0574)-width/2*sin(radians(150)));
  rotate(radians(-60));
  text("150°",0,0);
  popMatrix();
}
- منبع: ترجمه از سایت howtomechatronics.com
- منبع: عکس شاخص از سایت makersportal.com
امیداورم پروژه ساخت رادار با آردوینو براتون مفید واقه شده باشه. پروژههای آردوینو دیگر را از دست ندهید. اگر این آموزش براتون مفید واقع شده ما را نیز دعا کنید و اگر خواستین میتوانید از محتوای رایگان آموزشی حمایت مالی کنید.
اگر این نوشته برایتان مفید بود لطفا کامنت بنویسید.
سلام .میشه کمک کنید. این خط به من ارور میده
void serialEvent (Serial myPort)
ERROR: variable or field ‘serial Event ‘declared void
خب الان پین های صفحه نمایش باید به کجا وصل بشه
سلام این کدهارو باید به هم بچسبونیم بعد بزاریم تو برنامه ؟
تا چند متر رو تشخیص می ده
liberary k mojod nist? کلی از برنامه ارور گرفت . و کلی نقطه همینجوری پراکنده داحل برنامه هست. اگر ممکن کد صحیح بگذارید